Rainwater harvesting is the ancient practice of capturing and using rainwater, and it’s making a comeback! About half of all household water usage in the summer goes to outdoor uses such as watering lawns and gardens. It makes sense, and saves money, if you use rainwater from a rain barrel instead of tap water wherever possible.
The use of rain barrels, installed at the bottom of a downspout, is the most common form of rainwater harvesting. The rain barrel collects rainwater that flows off your roof, storing it for later use. Rain barrels come in a variety of sizes and colours, and can be easily incorporated into your existing landscape.
What’s so great about rainwater?

- Rainwater saves money! By using rainwater in your yard and garden, you can save money on your municipal water bill.
- Rainwater is better for plants! Plants prefer rainwater. Rainwater is warmer and softer than tap water, and it hasn’t been treated with chlorine.
- Rainwater is a resource! Rain barrels provide a ready supply of water during the hot, dry days of summer, reducing the stress on our waterways and groundwater reserves.
Installing a rain barrel
Step 1: Pick Your Barrel
There are many different sizes, shapes, and styles of rain barrels. Your municipality may sell rain barrels at a subsidized rate, or you may want to see what your local hardware store or garden centre has for sale. Some people even choose to make their own rain barrels.
Depending on your water needs, the size of your property, and the size of your roof area, it’s possible to install rain barrels at more than one downspout location, or connect multiple rain barrels in tandem. Painted rain barrels are also becoming popular, allowing you to add an artistic touch to your garden.
Step 2: Choose Your Location
To take advantage of the rainwater that flows off your roof, your rain barrel should be installed at the bottom of a downspout, either on your home, garage or shed. There are usually four downspouts on a typical home – one for each corner of the house. Choose a downspout in a convenient location and provide a level base for your rain barrel. It’s often a good idea to elevate your barrel to make it easier to fill a watering can.
Are you connected or disconnected?


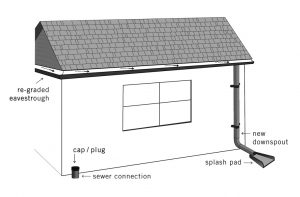
Take a look at your downspouts. Do they connect straight into the ground (picture 1), or do they end in an elbow piece (picture 2)? If your downspouts are connected (picture 1), you will have to disconnect them before proceeding with your rain barrel installation.
Contact your municipality for more information about downspout disconnection.
York: 1.877.464.9675 | Peel: 905.791.7800 | Durham: 1.866.786.8116 | Toronto: Call 311 or visit www.toronto.ca/water
Step 3: Attach the Rain Barrel
Place your rain barrel next to the downspout, taking into account the height of the base you have chosen. Mark off the length of existing downspout that will need to be removed. Cut at the marked point and connect your rain barrel to the downspout using the connector piece that came with your rain barrel kit.
Step 4: Direct the Overflow
Your rain barrel should come with an overflow system. Make sure that the overflow is directed to a suitable location downhill from your home, such as garden or grassy area.
What to do with all that rainwater?
Now that you have collected all this rainwater, it’s time to use it! The simplest way is to fill a watering can and water your gardens and hanging baskets. Another option is to attach a soaker hose, which can be used to slowly water a nearby garden. A typical rain barrel can fill up after just one rain storm, so use the water you collect on a regular basis to make the most of your rain barrel.
Rain barrel storage and maintenance
Good winter care will ensure that your rain barrel is ready for use the following year.
- When temperatures start to approach freezing, disconnect your rain barrel from the downspout.
- Add a temporary extension piece or corrugated tubing to the downspout to direct it to a suitable location downhill
from the house. - Turn the barrel upside down – if it is left upright, the barrel will fill with water, freeze and crack. If you have room in
your garage or garden shed you can store it there until spring.
Additional resources
- How-to video on installing a rain barrel
- How-to video on making your own rain barrel
- TRCA’s Sustainable Technologies Program
This article has been reproduced from the TRCA Healthy Yards fact sheet.

